Quick Start
Five steps from a fresh CollarID Mk II to a synced, deployable device. About 30 minutes total.
Charge to full
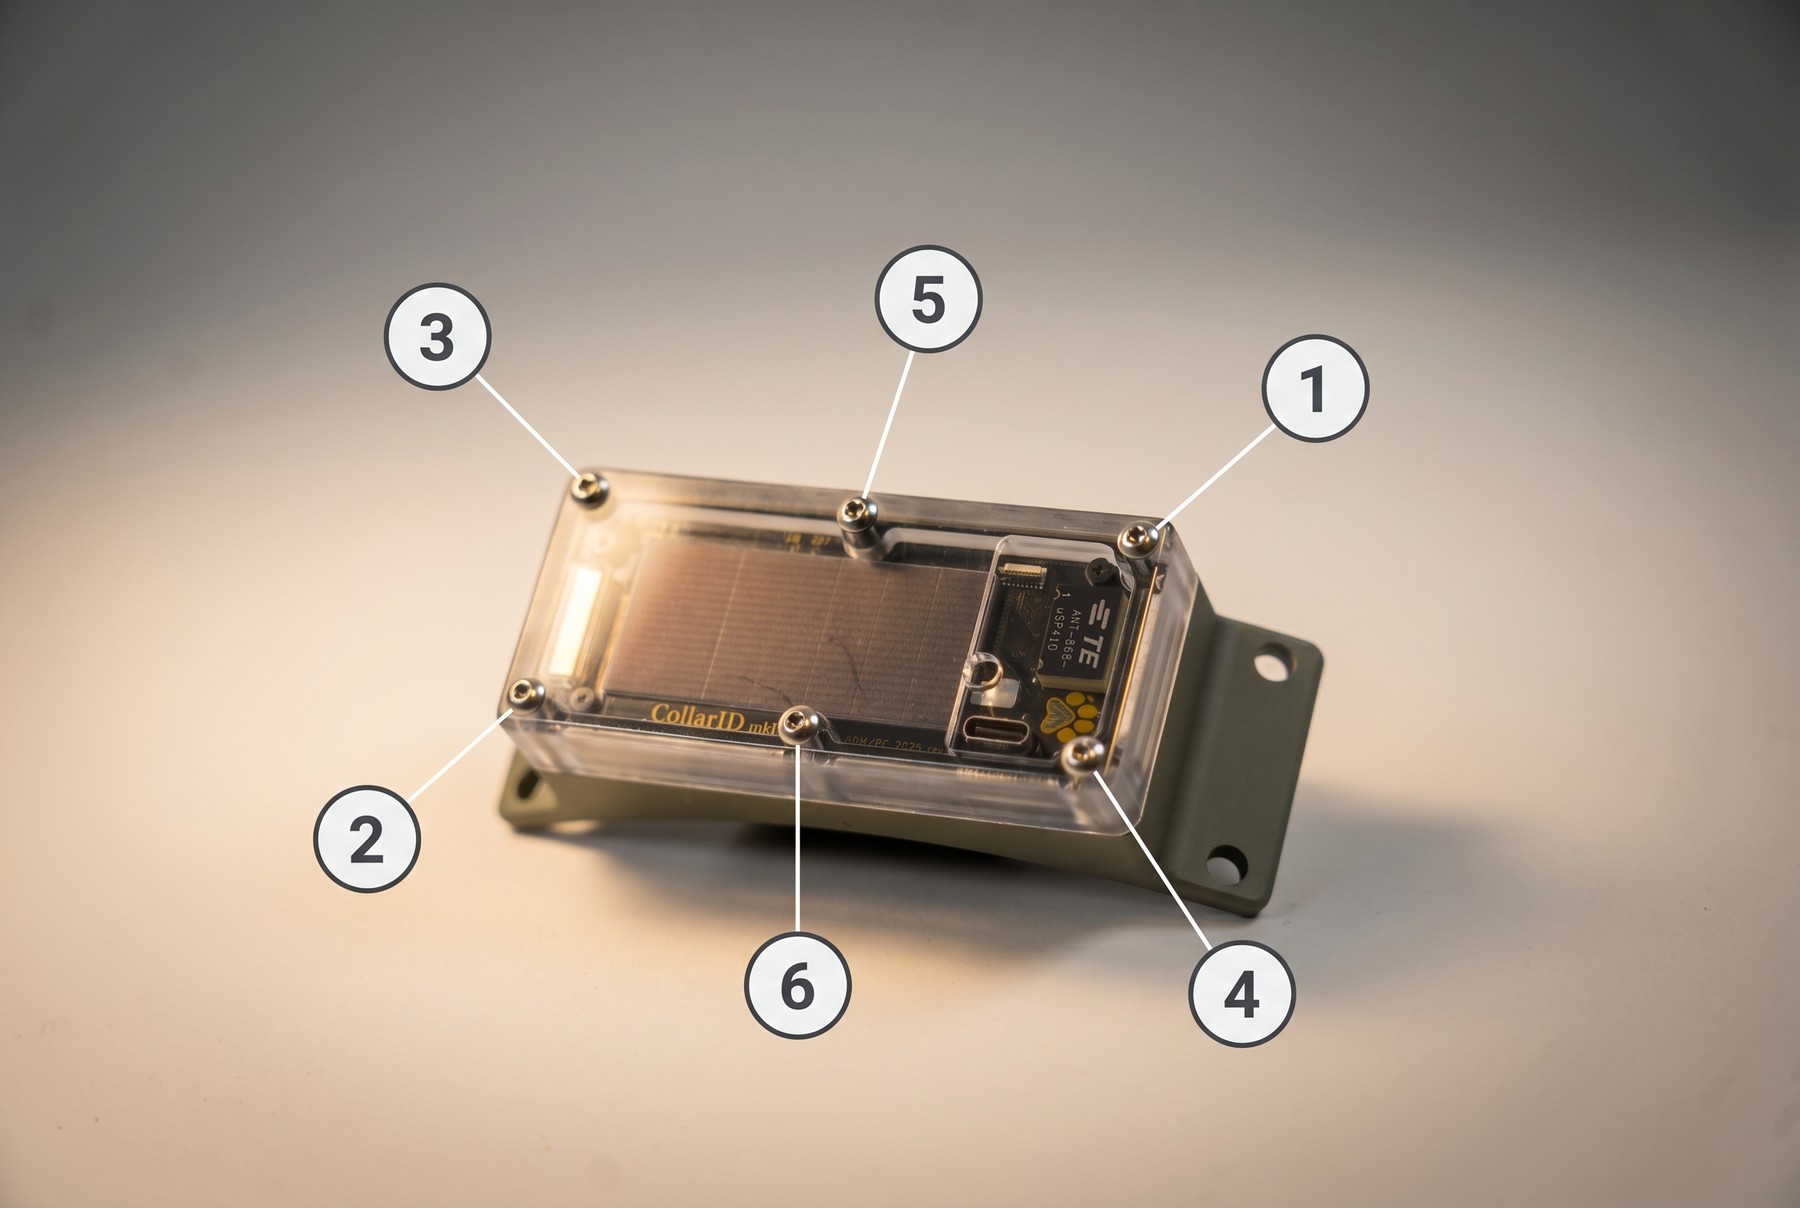
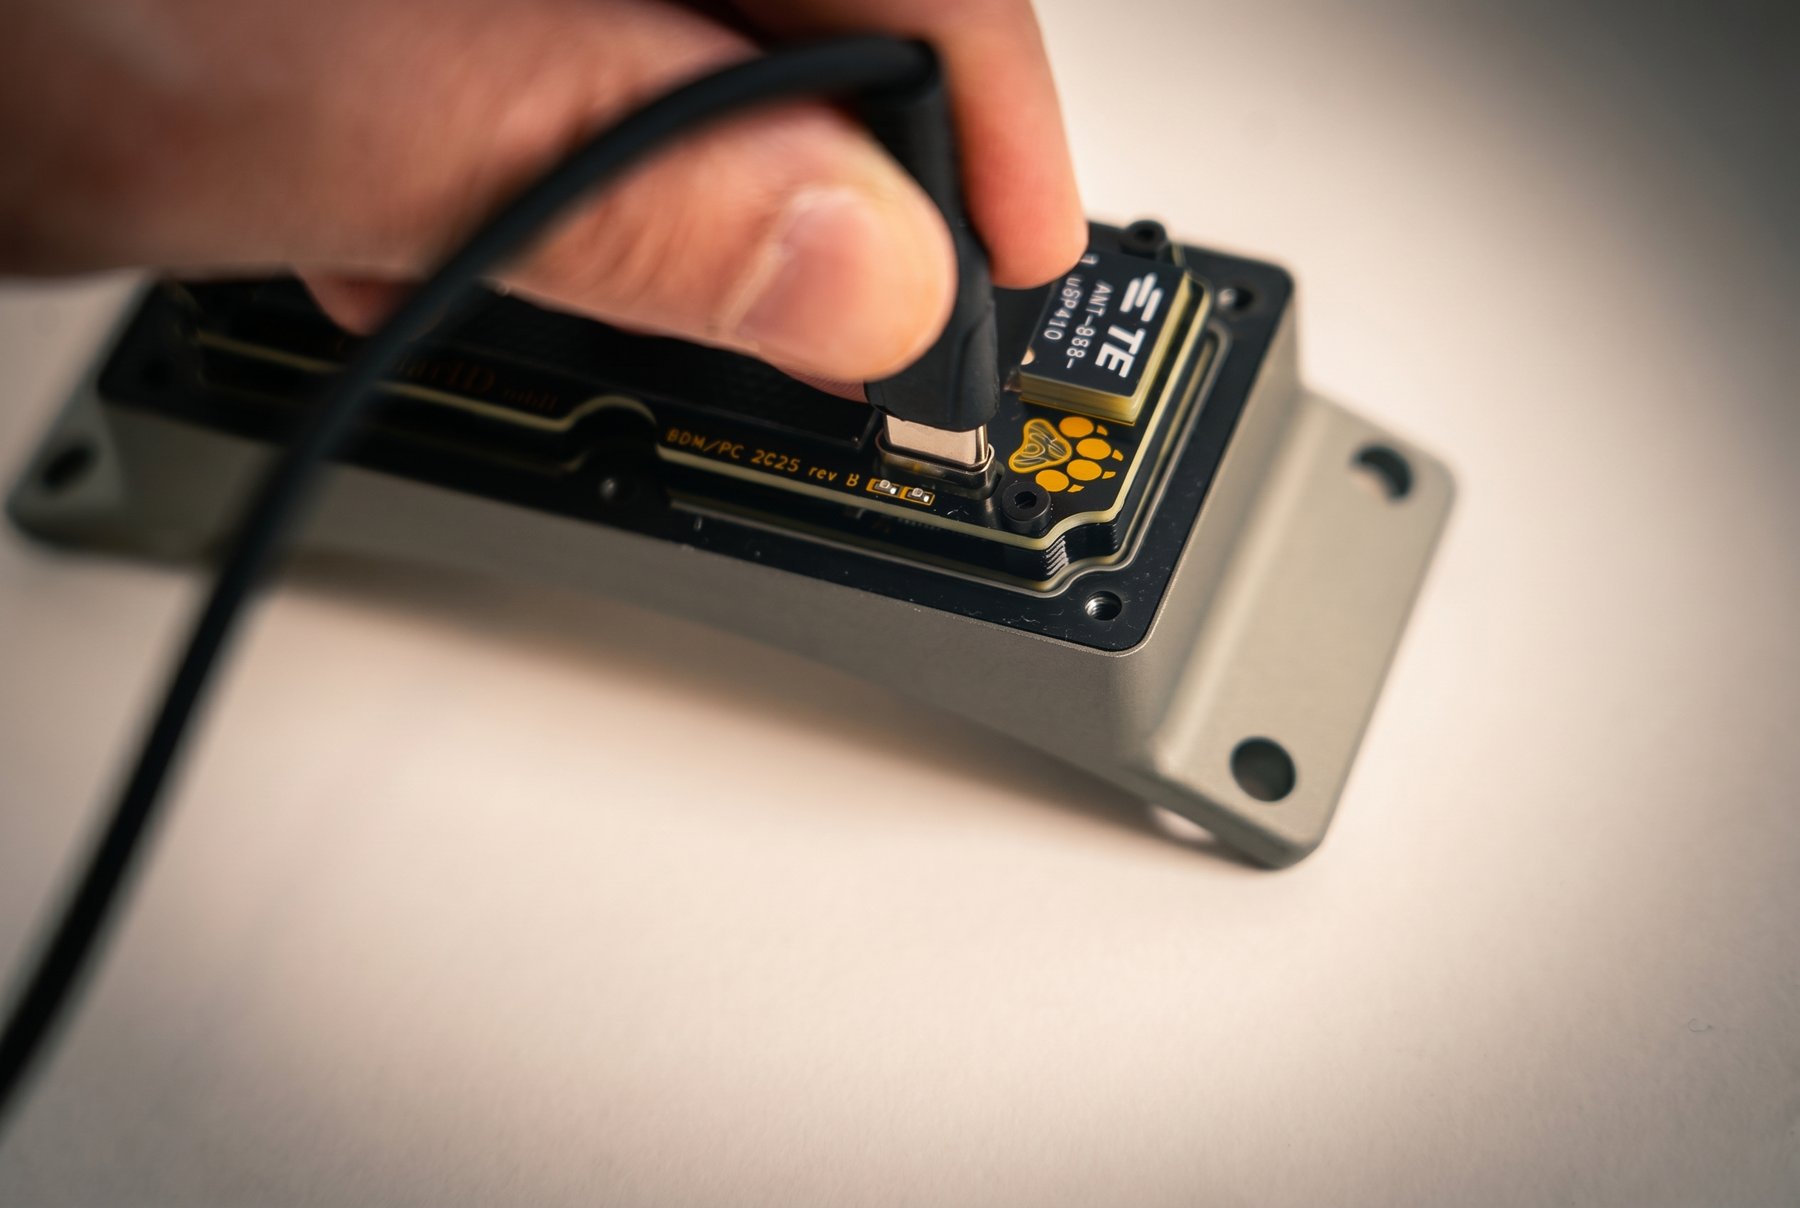
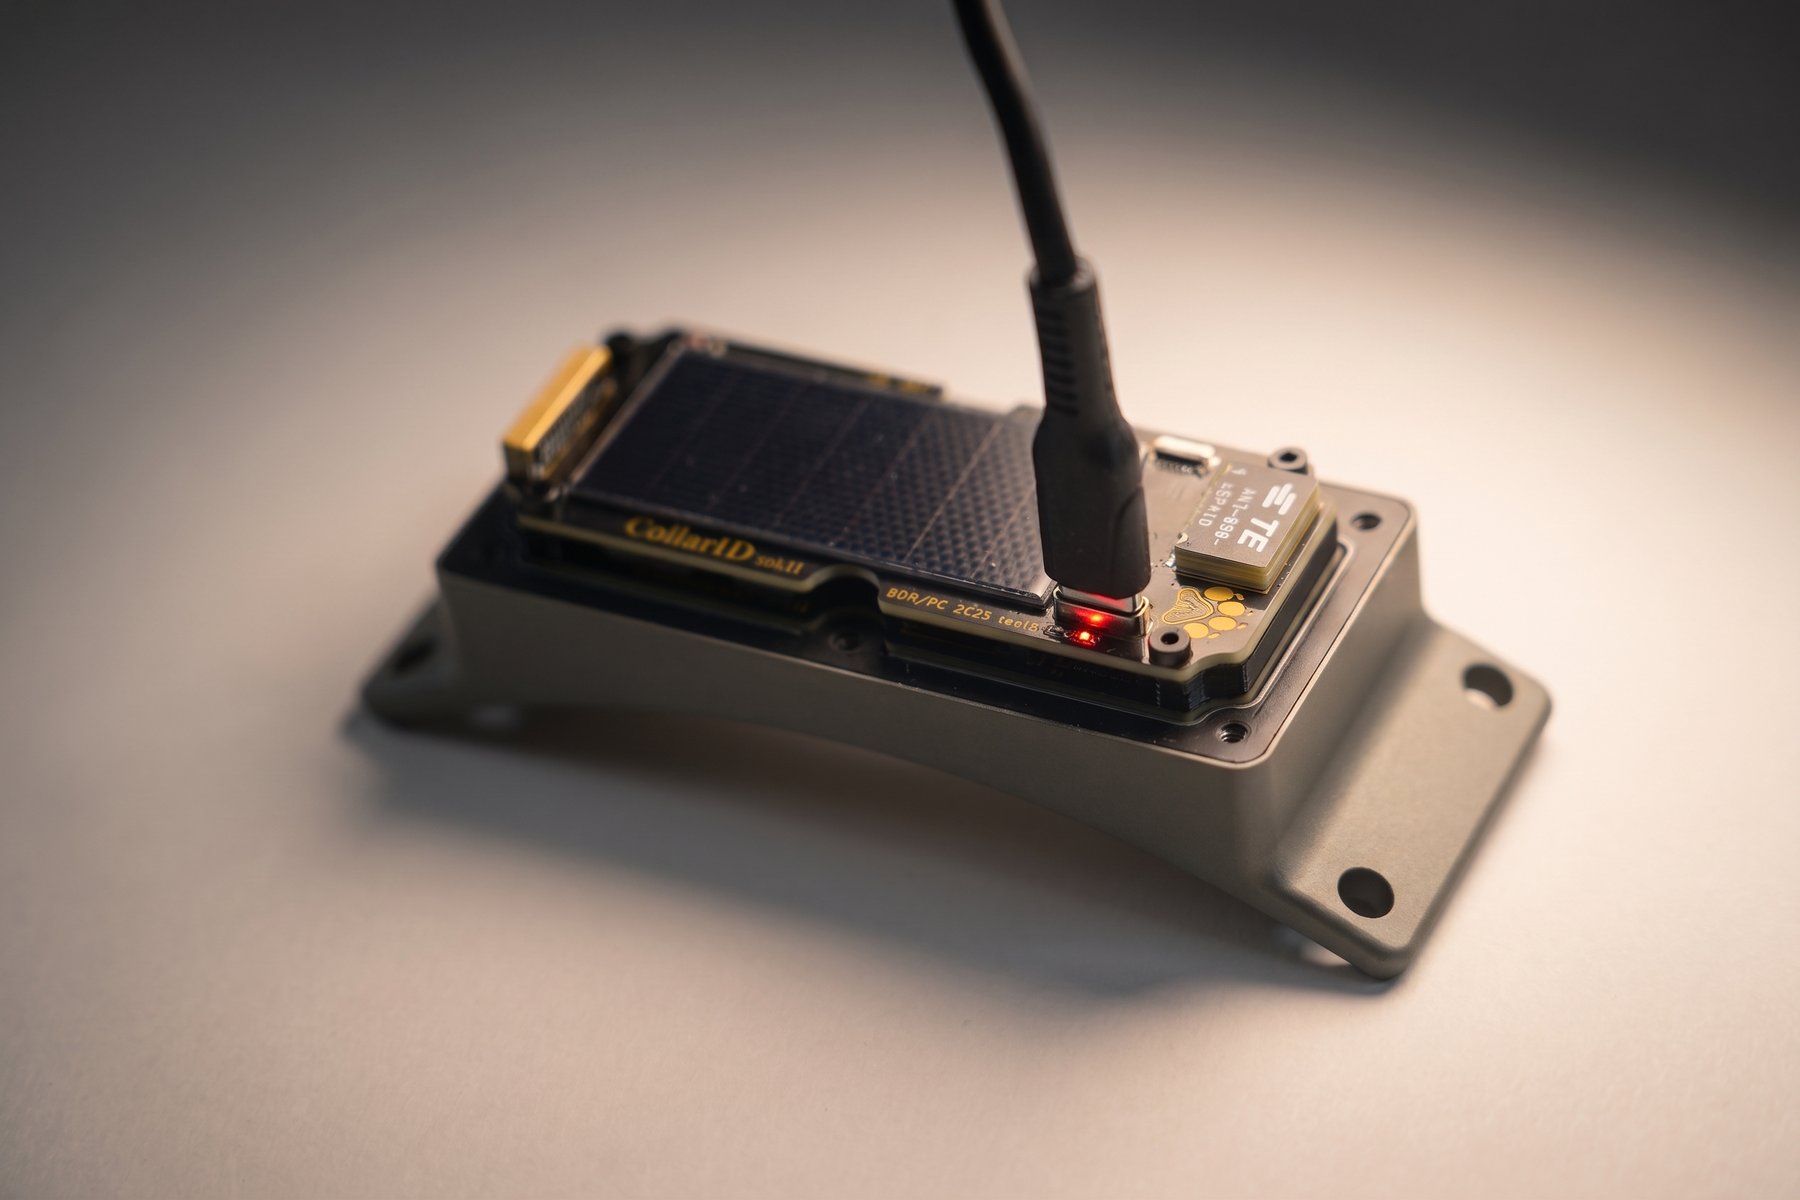
Open the cover (six screws around the perimeter) and connect a USB-C cable to the port on the top edge of the front PCBA. The cover must come off — there is no pass-through.
- Charge LED red = charging in progress
- Charge LED green = battery full, ready to deploy
Format the SD card as exFAT
Use a freshly formatted exFAT card. We recommend industrial-grade Kioxia cards — they handle power loss, sustained writes, and field temperatures better than consumer cards.
- macOS: Disk Utility → Erase → Format: ExFAT
- Windows: Right-click the drive → Format → File system: exFAT
Power on, outdoors, with a clear sky
Insert the formatted SD card and slide the side power switch to ON (silkscreen-labelled). Bring the device outside before powering on so it can acquire its first GPS fix.
You should see this LED sequence on the paw print:
- Boot animation (green pulse → soft white-cyan glow → off)
- Steady green — SD card is being scanned
- LED off briefly
- Flashing blue — searching for GPS fix (up to 10 min)

Configure a schedule via BLE
A freshly formatted SD card causes the device to enter BLE mode automatically (steady blue LED) once boot finishes. Connect from one of:
- Web: CollarID.org → Configure (Chrome or Edge only — Web Bluetooth needs a Chromium-based browser)
- iOS: the CollarID app on the Apple App Store
- Android: the CollarID app on Google Play
Edit your schedules (up to 5 windows), check the power-budget estimate, then disconnect. The schedule commits when the steady blue LED turns off ~10 seconds later.
Full schedule procedure →Verify the GPS fix and close it up
Confirm the flashing-blue LED has turned off on its own — this means the device acquired a GPS fix and synced its clock. The blue states read as a pale white-blue through the cover and can be hard to see in direct sunlight, so cup your hand over the paw print or step into shade to check. If the LED times out after 10 minutes, the device will run unsynced; bring it outside again and re-trigger BLE with a magnet to restart.
Replace the cover, hand-tighten the six screws in a star pattern (do not use an electric drill), and the device is ready to deploy. For long deployments, apply Loctite 242 or 243 (medium-strength blue threadlocker) to the first 2–3 threads of each screw before closing.